Showing posts with label Before/After. Show all posts

Thursday, July 14, 2011

Swag Bag

I went to the Hallmark store a few weeks ago to buy a bunch of birthday cards. This is the paper bag my purchase came in:


Isn't it sweet? I just loved that little bird and that yellow-purple -white combo. I couldn't toss the bag in the recycle bin. But what to do with it? I thought about it for a few days and came up with this little hostess gift:

I cut out the bird portion of the bag, typed out that little "for you!" balloon, and glued the whole thing on a glass jar (that used to contain peaches). Inside the jar are herbs from our garden -- mint, basil, and rosemary. Simple...and somebody else now gets to enjoy little Chester (couldn't help it - I named the bird).
-----------------------
I'm linking up this post to:

Somewhat Simple
Transformation ThursdayThe Shabby NestThe DIY Show Off


Friday, March 11, 2011

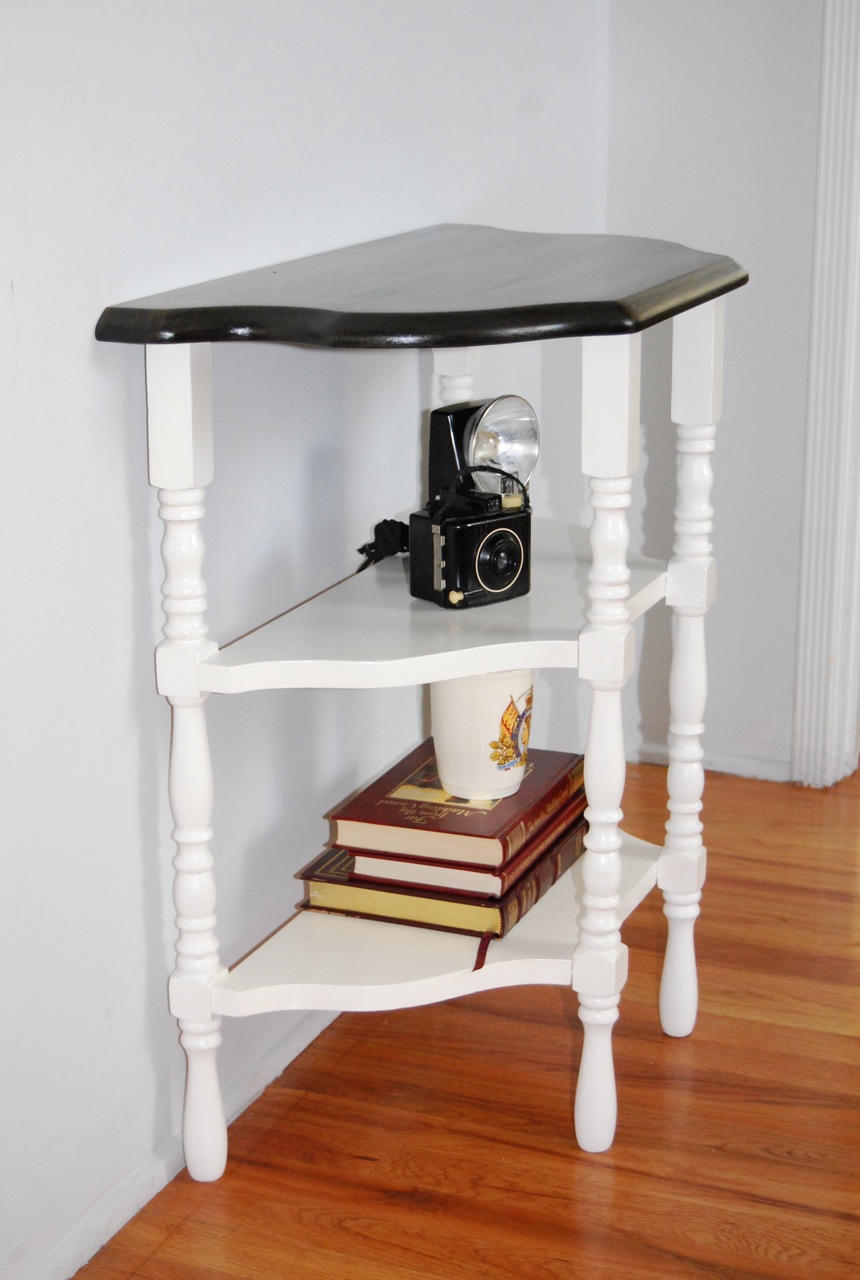
My Little Half Table

BEFORE


DURING


AFTER
I bought this little table at an estate sale months ago. It just called out to me "take me home!" despite the fact that I really didn't need a little table like this (note to self: don't make purchases without really thinking about where the item is going to go in my house). I knew immediately that I wanted to re-stain the top and paint the bottom two shelves white. Jumping ahead -- what did I learn from this project? Here is what I took away:

1) Spindles stink! They were a giant pain to sand and were difficult to paint evenly (I'm not particularly patient). It got better with each coat, but at the beginning I thought "what have I gotten myself into?!" Not an easy project for a beginner.

2) I followed the directions on the back of the stain container and left the walnut stain on the table top for a minimum of 30 minutes. When I wiped down the top, the stain was way too dark. It was practically black. So I re-sanded and wiped the stain on and off in under 5 minutes. The results were dark but not too severe. 

3) Clean, clean, clean! I was lazy (again) and didn't do a very good job of dusting off the piece between coats of white paint (done over several days). Every time this table sat in my garage, dust would settle on the table. If I had been more diligent about cleaning the table very carefully between coats, I wouldn't have had to do so many touch-ups. Lesson learned.

I'm linking this post to:
Furniture Feature Fridays

Wednesday, February 23, 2011

Brand New Bangle

I made a quick dash into a thrift store a week ago and came out with this:
That's a plastic bracelet covered in bright yellow dots. Very 1986. Cost me $1.25 (they must have considered it retro!). Anyway, I've been wanting a bangle bracelet so I took this one, found a scrap of fabric in my craft drawer, covered it using Modge Podge, and finished it off with a quick spray of Poly. From start to finish, it took me 1 hour.  Here's the final results:


I think it turned out pretty nice. The inside where the fabric overlaps isn't super tidy but who's going to know besides me?? Wouldn't this also make a cute napkin ring? It wouldn't be difficult to find 6 plastic bracelets and then cover them in a pretty fabric for Easter dinner...just an idea! And here's another tip -- if you want designer fabric for small projects like this, look on Etsy under "supplies" and "fabric scrap pack." I bought a bag of scraps  for $10 and received some decent pieces. You just have to accept that it's a grab bag so you may not like everything you get.

I've linked up this post to the following. so hop on over and see what other creative people have been up to this week: 
giveaways

Thursday, January 13, 2011

Nate's Table

A very long time ago, a sweet lady from our church gave us a child's table with 2 chairs. She had it in her house for her grandchildren. I appreciated her generosity and was touched that she thought of our family. That being said, the design of the table didn't really match the decor of our house so I decided to strip the table & chairs and repaint them. I didn't have any idea what I wanted the table to look like when I was done so it took me a while to come up with a plan. I only hoped to have it finished before my son reached high school(!!) Also, I only had about 3 hours a week to work on it...and that had to be during decent weather since the table was in our {unattached} garage. So here is the before picture that I took -- I kid you not -- back in April 2010:

Noah's Ark themed table & chairs. Plaid blue/green & yellow.

And -- ta da -- here it is after I finished -- again, I kid you not -- in January 2011 (that would be 9 months. Sick, I know):


The colored detail is heavy-duty fabric, glued on with Modge Podge (my fist MP project!). I had thought about sewing seat cushions out of the fabric but chickened out. I'm really happy with the results! Of course, Nate hasn't even given it a second glance but that's okay. (actually, he cried when he saw it because he was mad that he didn't get to help me glue on the "1" and the "2". Sigh.) I hope he'll eventually use it for working on art projects, reading books, etc.

I'm linking this post up to:
The DIY Show Off
Furniture Feature Fridays

Sunday, July 11, 2010

Tweet-Tweet Treasures

Before:
$2 frames and prints at a garage sale.  Very dirty.  Looking for love.


After:

I painted and "renovated" one of the frames for my bathroom wall, with the help of some fabric and paper.  The small, round frame with the ice skaters was also bought at this garage sale and just needed a good cleaning.  The larger, round item is an embroidered flower off of a skirt I picked up at a thrift store.